| Level: | Easy |
| Total: | 2 hr 10 min |
| Active: | 25 min |
| Yield: | 4 servings |
Ingredients
- 1 small to medium spaghetti squash
- 2 large eggs
- 1/2 cup shredded mozzarella
- 1/2 teaspoon garlic salt
- Nonstick cooking spray
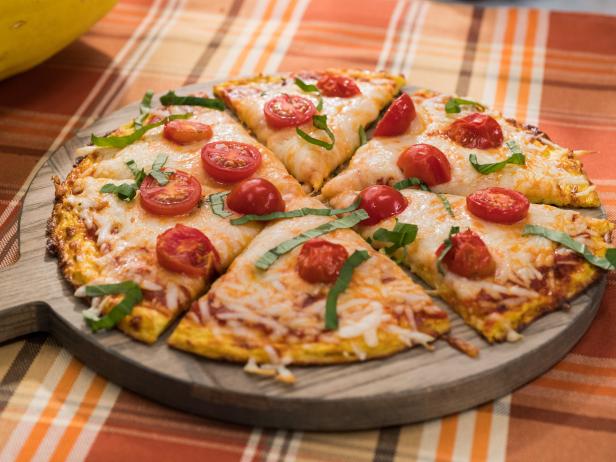
- Desired sauce and toppings, such as pizza sauce, shredded mozzarella, halved cherry tomatoes, fresh basil
Instructions
- Preheat the oven to 400 degrees F.
- Use a small paring knife to puncture the spaghetti squash a few times all over. Place on a baking sheet and bake until tender, about 1 hour. Let cool until cool enough to handle, then use a large knife to slice the squash open lengthwise. Scrape out the seeds with a fork and discard. Continue to use the fork to pull the flesh from its peel. (Leave the oven on.)
- Wrap the squash in a clean dishtowel and squeeze out all the excess water. (There will be quite a bit of water in the squash. It is important to squeeze out as much as you can so that the crust will have a better texture.)
- Whisk the eggs together with the shredded mozzarella and garlic salt in a large mixing bowl. Stir in the spaghetti squash until well combined.
- Line a baking sheet with parchment paper and spray with nonstick cooking spray. Transfer the squash to the center of the baking sheet and spread into a 10-inch circle. Bake until golden brown, about 20 minutes.
- Spread the pizza sauce on the crust and top with the desired toppings. Bake until the cheese is melted and bubbly, an additional 10 minutes.
Reviews
Here are a couple of tips now that I’ve made it twice:
1. Be patient wringing out the water. It will take a WHILE to get all the water out as much as you need to. If you don’t get it all out, your crust will be too soggy. Taking another reviewer’s advice, I tried using a salad spinner the 2nd time I made this, and it worked well as a starting point to get a bunch of water out of the squash; however, it was not enough. I did still have to squeeze and squeeze (and squeeze!) to get all the water out. The 2nd time I made it, I tried to see if refrigerating the squash overnight would help to dry it out even more, but I found that it really didn’t make all that much difference in texture between Experiment 1 (no refrigeration) and Experiment 2. The 2nd time out, I did “roll” it a bit thinner, and that helped to make it a bit sturdier. It is still not going to be as crispy as a breaded crust, but it was so delicious I didn’t care!
2. Roll it out thinly on the parchment-lined baking sheet. If it’s too thick, and it will not get as firm.
3. I used 1 full egg and 2 egg whites the first time because I had a gigantic squash, but the recipe is for a small to medium. This worked well for a large squash, and the crust did not have any eggy flavor.
4. I added Italian seasoning, and I cannot recommend this highly enough. It was DELICIOUS.
5. I baked my crust during the first round for 30 mins at 425F and it turned out perfectly (then topped and baked again for 10).
6. I used just a bit of Rao’s marinara with lots of mozzarella and pepperoni on my crusts and it was excellent. Another tip: I microwaved my pepperoni for 30 seconds to “par cook” it prior to putting it on the crust so it would get crispier. This worked well.
The flavor of this crust is phenomenal. When the squash is baking, it smells heavenly! I will make this recipe again and again. I am now experimenting to see what happens when I freeze a baked crust. I think it should work fine. Happy squashing, everyone!
I topped it with the same “package” mozzarella Katie Lee used, Mezetta pizza sauce, artichoke hearts (in water and drained well), halved small plum cherry tomatoes, a few pieces of baby spinach and some of the large spring onions sliced very thin. It was just ok. It looked nice when I cut my piece and held together. I usually love all of Katie Lee’s recipes but I don’t think I will be making this one again.
but having to squeeze out all the water was a huge process for me (all
day). I decided to purchase a ricer and put a coffee filter in the
bottom. I squeeze out the water in a matter of minutes. It’s so much
quicker to make now. Hope this helps others.
