| Level: | Intermediate |
| Total: | 4 hr 30 min |
| Prep: | 15 min |
| Inactive: | 2 hr |
| Cook: | 2 hr 15 min |
| Yield: | 36 mini squares |
Ingredients
- 1 1/2 cups dark brown sugar
- 1 1/2 pounds cream cheese, at room temperature
- 1/2 cup heavy cream
- 2 large egg yolks
- 1 tablespoon pure vanilla extract
- 1 3/4 cups creamy peanut butter
- 5 tablespoons vegetable shortening
- 12 ounces semisweet or bittersweet chocolate chips
Instructions
- For the cheesecake: Position a rack in the middle of the oven and preheat to 325 degrees F. Line a 8 by 8-inch baking pan with foil letting long flaps overlap on each side. Spray foil with nonstick spray.
- Break up the brown sugar to remove all lumps. In a standing mixer with the paddle attachment, beat the cream cheese and sugar on medium speed until very smooth. Add the cream and beat slowly; then add the yolks and vanilla mixing until just combined. Gently stir in peanut butter. Take care not to over beat the mixture; this incorporates too much air and causes the cheesecake to crack.
- Pour and evenly spread the batter in the prepared pan. Bake for 15 minutes. Open the oven to release some heat, then lower the temperature to 200 degrees F. Continue to bake the cheesecake until the outside is set but the center is still loose, for about 45 minutes. Turn off the oven, and cool cheesecake in the oven for 45 more minutes. Cover and refrigerate at least 8 hours or overnight.
- Lift cheesecake from the pan by lifting up the foil. Transfer to a cutting board. Cut into
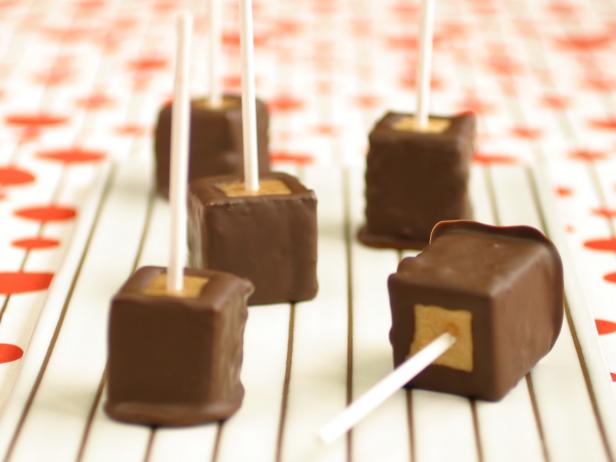
- 1 1/2-inch cubes. Stick a wooden pop stick halfway into each bar and freeze for 1 hour.
- Meanwhile, put the shortening and chocolate in a medium heatproof bowl. Bring a saucepan filled with an inch or so of water to a very slow simmer; set the bowl over, but not touching, the water. Stir the chocolate occasionally until melted and smooth. Remove from the heat and let cool slightly. (Alternatively, put the chocolate in a medium microwave-safe bowl. Melt at 50 percent power in the microwave until soft, about 1 minute. Stir, and continue to heat until completely melted, about 1 minute more.)
- Dip the pops into the chocolate mixture, and stand on waxed paper to set, about 5 minutes. Serve cold (straight from the fridge), or freeze up to 2 weeks. Frozen pops make a cool summer treat, or can be allowed to temper for 10 minutes at room temperature before serving.
Nutrition Facts
| Serving Size | 1 of 36 servings |
| Calories | 239 |
| Total Fat | 19 g |
| Saturated Fat | 8 g |
| Carbohydrates | 16 g |
| Dietary Fiber | 1 g |
| Sugar | 13 g |
| Protein | 5 g |
| Cholesterol | 36 mg |
| Sodium | 76 mg |
Reviews
Having dipped items in chocolate before, I knew to buy extra chocolate. I bought 20 ounces instead of 12, and we barely had enough chocolate. Not sure if that’s on me, but this is not first recipe where I would have run out of chocolate if I had not opted to increase by about 50%.
I made them one day, and cut them into about 36 cubes the next day. I wish I had frozen them longer than one hour as the last handful almost fell off the stick. In fact, I will freeze before cutting them next time too because some parts were soo soft.
After we all ate one, we decided to freeze two each in a mini snack back and put all in a freezer bag. We love a splurge now and then, but this will definitely help with portion control.
They were not hard to make at all because we made them in steps a little over 24 hours. You just need time to have them cool, freeze, and then the dipping and cooling again. Super easy, just make a day ahead of time.
My only complaint would be when I was slicing up the cheesecake portion. Instead of cutting it when it comes out of the fridge, I think it would be better to freeze it slightly. The cubes seemed to melt quickly when I was cutting them and rolling each one into the chocolate mixture.
I stuck to the recipe since it was my first time doing this. It took much longer to bake than an hour. I kept it in the oven at 200 degrees for at least 2 and a half hours before it was actually set. Cutting out the pops is really time consuming and very messy. I recommend putting the sticks in before actually cutting. Semisweet chocolate chips are much to rich, and a big turn off for the kids at the party.
I have a major sweet tooth but these were too rich for even me to do more than a couple. Too much hassle to me and I doubt I’ll make them again.
