| Level: | Advanced |
| Total: | 3 hr 45 min |
| Prep: | 1 hr |
| Inactive: | 2 hr 30 min |
| Cook: | 15 min |
| Yield: | 30 to 40 servings |
Ingredients
- 5 1/2 cups chocolate ice cream base
- 5 1/2 cups strawberry ice cream base
- 11-by-17-by-1/2-inch sheet chiffon cake
- 24 ounces sugar
- 12 ounces light corn syrup
- 12 ounces pasteurized egg whites, at room temperature
- 1 1/2 teaspoons vanilla extract
- 3 pinches kosher salt
Instructions
- Line two 13-by-9-inch metal cake pans with plastic wrap and place in the freezer.
- Pour the chocolate ice cream base into the bowl of a stand mixer fitted with the paddle attachment. Turn the speed to low. With the mixer running, slowly pour in the liquid nitrogen until the ice cream reaches a classic soft-serve consistency.
- Spread the ice cream evenly in one of the prepared pans and freeze until firm, at least 2 hours. May be made several days in advance.
- Clean the bowl and paddle and repeat with the strawberry ice cream.
- Set the chiffon cake into a parchment-lined half sheet pan and place in the freezer for at least 1 hour and up to several hours in advance of assembling the Baked Alaska.
- Combine 8 ounces sugar, 4 ounces corn syrup and 2 ounces water in a 2-quart saucepan and place over high heat. Stir just until the sugar dissolves, about 5 minutes. Clip on a candy thermometer and bring the mixture to 240 degrees F.
- While the syrup is cooking, place 4 ounces egg whites, 1/2 teaspoon vanilla and one pinch salt into the bowl of a stand mixer and using the whisk attachment, whisk the eggs on high speed until they reach medium peaks, 2 to 3 minutes.
- When the sugar syrup reaches 240 degrees F, remove from the heat and with the stand mixer on low speed, slowly and carefully pour the syrup in a thin steady stream into the egg white mixture, being careful not to come in contact with the whisk. Once all of the syrup has been added, increase the mixer speed to high and whisk until stiff peaks are formed and the mixture has cooled, 8 to 10 minutes. Transfer the mixture to a large piping bag and refrigerate while preparing the second and third batches. Repeat the recipe two more times for a total of three batches of meringue.
- Remove the meringue from the refrigerator 30 minutes prior to using.
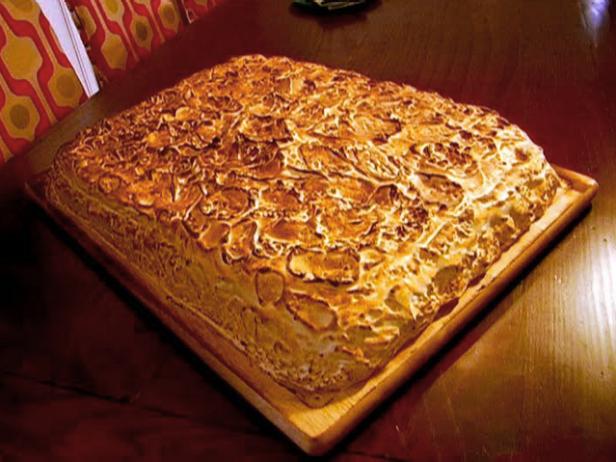
- To assemble and complete the Baked Alaska: Cover the perimeter of a large, wooden cutting board, one that is slightly larger than the cake, with strips of heavy-duty aluminum foil. Remove the cake and ice cream from the freezer. Place the cake on the prepared board. Invert the sheet pans of ice cream atop the cake. Peel away the plastic wrap from the ice cream. Pipe the meringue over the entire surface of cake and ice cream covering completely.
- Use a propane torch to brown the meringue. Serve immediately or freeze for up to a week once the meringue has been browned.
- Propane gas torches are highly flammable and should be kept away from heat, open flame, and prolonged exposure to sunlight. They should only be used in well-ventilated areas. When lighting a propane gas torch, place the torch on a flat, steady surface, facing away from you. Light the match or lighter and then open the gas valve. Light the gas jet, and blow out the match. Always turn off the burner valve to “finger tight” when finished using the torch. Children should never use a propane gas torch without adult supervision.
Nutrition Facts
| Serving Size | 1 of 36 servings |
| Calories | 188 |
| Total Fat | 4 g |
| Saturated Fat | 2 g |
| Carbohydrates | 37 g |
| Dietary Fiber | 0 g |
| Sugar | 31 g |
| Protein | 2 g |
| Cholesterol | 13 mg |
| Sodium | 59 mg |
Reviews
It’s worth the time and trouble. Use your favorite ice cream flavors. I’ve tried spumoni and it’s great. An old fashioned dessert seems brand new now.
